Identify Fish by Photo: Photo Clues, Fish Details, and Next Checks
A practical guide to identify fish by photo: which visible clues matter, how to shoot better images, and what to check next for reliable matches.
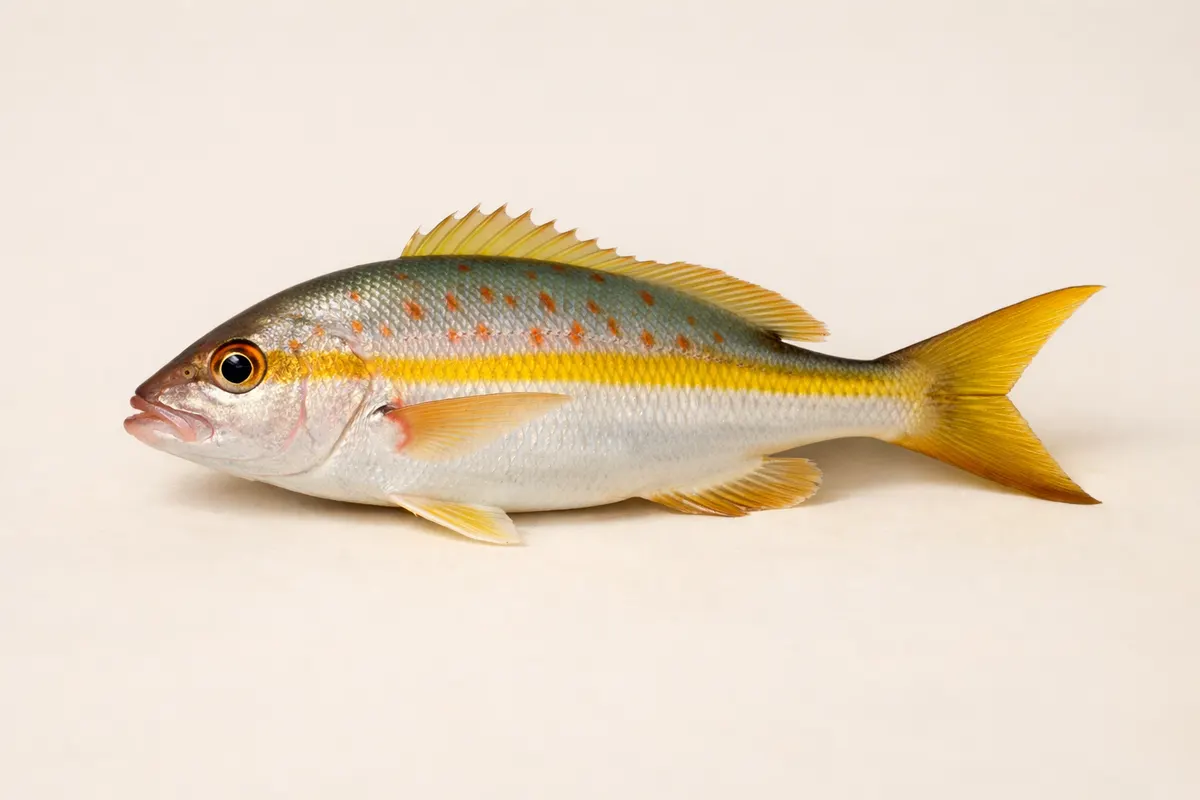
Quick answer: what a photo can and cannot show when identifying fish
A single photo can reveal many useful clues for identifying a fish: overall body shape, fin arrangement and sizes, striking marks such as stripes or spots, scale texture when visible, and contextual hints like habitat or bait nearby. These features often narrow a candidate list quickly and let you rule out obvious groups (for example, flatfish vs. round-bodied fish).
What a photo usually cannot do alone is prove a forensic-level identification. Similar species may differ only in small counts (fin rays, scale counts, or tiny color nuances) or in internal features not visible in casual pictures. Lighting, angle, and depth of field can also change perceived color and proportions, so treat a single image as strong evidence but rarely final proof.
If you want reliable, actionable ID after an image, pair visible photo clues with context: where the fish was caught or seen (salt vs. fresh water, depth or shoreline), size or scale reference, and behavioral notes (bottom-dweller, schooling). Use those combined observations to guide next checks instead of relying on one visual match alone.
Photo checklist: shots to take before trying to identify fish by photo
A few intentional photos make identification far easier. Start with a clean profile shot: fish side-on, body straight, photographed at roughly the fish’s midline. That view captures body shape, fin positions, and many key markings.
Add close-ups of diagnostic areas: the head (mouth shape, barbel presence), dorsal and anal fins (spine count and placement), tail shape, and any distinctive marks like a lateral line, ocelli (eye-spots), or scale texture. If possible, include a scale object (ruler, coin) near the fish to show size; size alone often separates juveniles from similar adult species.
Don’t forget context shots. Photograph the water or shoreline where you found the fish, and take a quick shot of the surrounding gear, bait, or substrate. These clues help eliminate species that require a different habitat. Also, take more than one angle to compensate for glare or perspective distortion.
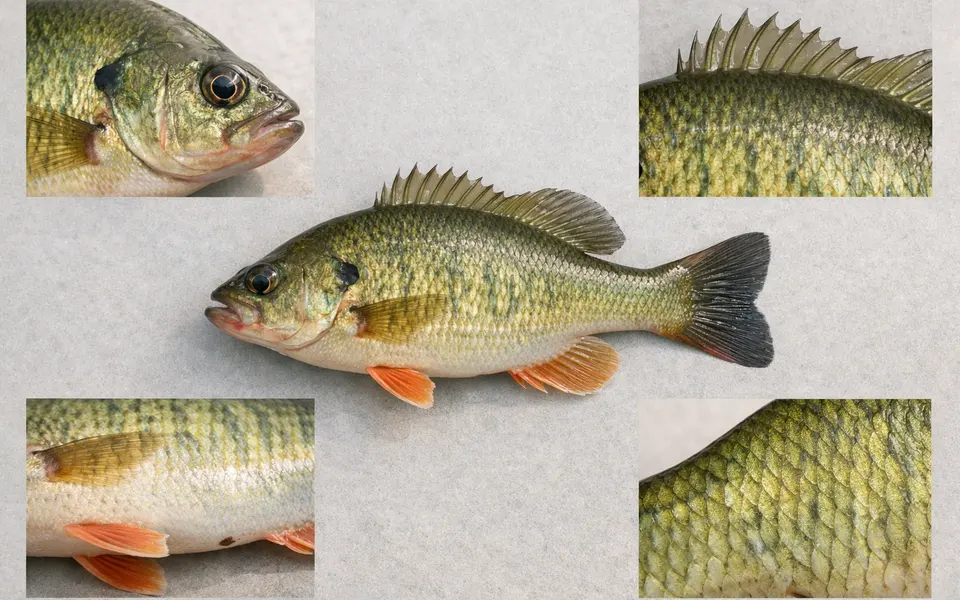
- Profile shot: fish side-on, body straight, midline in frame.
- Head close-up: mouth shape, eye position, barbels, teeth visible if safe.
- Fins: dorsal, anal, pectoral and tail close-ups for spine and shape clues.
- Markings: close view of spots, stripes, saddle marks, and lateral line.
- Scale or size reference: coin, ruler, hand—something to indicate length.
- Habitat/context: a quick photo of water type, depth clues, or substrate.
- Multiple angles: top, side, and head views reduce misread color and shape.
Visual clues that matter most when you identify fish by photo
Prioritize stable anatomical features over color alone. Body shape (elongate, compressed, deep-bodied, flattened) and fin placement are relatively stable across lighting conditions and are often decisive when matching a photo to a species group. For instance, the tall, laterally compressed body of a sunfish differs clearly from the long, eel-like profile of an eel even if colors vary.
Countable and structural details are next: the number and arrangement of dorsal fins (single vs. separate spiny and soft dorsal), presence of fin spines, tail shape (forked, rounded, truncate), and mouth orientation (terminal, inferior, superior). These features separate families in many fish guides and are usually visible in a clear side or angled photo.
Surface texture and markings help refine the ID. Look for scale type (smooth vs. rough), distinct striping patterns or bands, spots and ocelli, and any unique appendages like long filaments or fin extensions. Patterns that cross the lateral line or encircle the eye are especially diagnostic. Note that color can shift with light and the fish’s stress—use pattern geometry and location rather than hue alone.
- Body shape and profile: overall silhouette and depth.
- Dorsal and anal fin structure: spiny vs. soft rays and their placement.
- Tail shape: forked, lunate, rounded, truncate.
- Mouth and head features: mouth position, barbels, snout shape.
- Markings and pattern geometry: stripes, bands, spots, eye-spots.
- Scale and skin texture: visible ctenii (roughness) or smooth scales.
- Contextual signs: substrate, schooling behavior, or nearby vegetation.
Examples by type: photo clues for common freshwater and saltwater fish
Freshwater bass and sunfish lookalikes: Many roadside freshwater photos show a panfish-like body with bright colors. Bluegill and pumpkinseed have a deep, laterally compressed body and a short head; look for a continuous curved dorsal outline and a small mouth. Largemouth and smallmouth bass are elongate and robust—note jaw length (extends past eye in largemouth) and a split dorsal (spiny front, soft rear).
Flatfish and bottom-dwellers: A clear top-down photo is best for flatfish. Their flattened bodies and both eyes on one side are unmistakable. For bottom-dwelling saltwater species like sole or flounder, substrate matching (sand vs. gravel) in the background confirms habitat and rules out similarly colored midwater fish.
Elongate or eel-like fish: Eels, needlefish, and some gobies may look similar from an oblique angle. Eye position and mouth shape separate them—needlefish have long beaks and a torpedo body, while true eels lack paired pelvic fins and have a continuous dorsal-anal-tail fin margin. Include a head shot to check these details.
Reef and tropical species: Bright reef fish can be misleading because color changes under water. Look for fin shapes (filamentous extensions on certain wrasses), distinctive patches (black bands through the eye), and scale texture. Habitat in the background—coral, rubble, or seagrass—helps narrow likely genera.
- Bluegill/panfish: deep body, short head, ear (opercular) flap or spot.
- Largemouth bass: large mouth extends behind eye, separated dorsal fins.
- Flatfish (flounder/sole): top-down flattened silhouette, both eyes on same side.
- Needlefish vs. eel: beak-like jaw vs. continuous fin margin and lack of pelvic fins.
- Wrasse/reef fish: filamentous fins, eye bands, and coral background clues.
Compare likely matches: combining clues to separate lookalikes
When two species look similar in a photo, use a checklist approach: compare body shape, fin counts/placement, head and mouth features, and markings in that order. For example, juvenile snapper and small jacks can both appear silvery and deep-bodied; checking fin origin relative to the pectoral fin and the presence of any toothy snout will separate them.
Use size and proportions as a tie-breaker when patterns overlap. A fish that appears short and deep at one angle can look elongated at another, so prioritize proportions measured in the same image (head length vs. standard length) and verify with a scale reference photo. If you have multiple photos, cross-check them before choosing a match.
Finally, list what extra evidence would confirm each candidate: habitat matching (salt vs. fresh), behavior notes (bottom-feeding vs. pelagic schooling), and small diagnostic features not visible in the existing image (fin ray counts, gill raker shapes). Use these extra checks to decide whether the photo supports a confident ID or only a probable group.
- Order clues: silhouette → fin placement → head/mouth → markings.
- Proportions matter: compare head length to body length within the same image.
- Context checks: habitat, depth, and nearby species narrow matches.
- Extra evidence to seek: size reference, additional angles, or behavioral notes.
- When in doubt, categorize to family or genus rather than species.
Common mistakes that mislead photo-based fish identification
Relying on color alone is the most frequent error. Light, water color, camera white balance, and stress responses can drastically alter a fish’s apparent hue. Stripes and spot patterns—how they wrap around the body or align with fins—remain more trustworthy than exact color.
Another trap is assuming that juvenile and adult forms are the same species based on a single trait. Juveniles often bear dramatically different marks or shapes and may be mistaken for unrelated fish. Size reference and knowledge of life stages for suspected species reduce this problem.
Perspective distortion and partial views create false impressions of shape. A bent body or an angle that foreshortens the head can misrepresent proportions, making deep-bodied fish look elongate or vice versa. Take multiple shots and include straight-on side profiles to minimize this risk.
- Mistake: trusting color without pattern context.
- Mistake: ignoring life-stage differences between juvenile and adult looks.
- Mistake: drawing conclusions from a single, partial, or foreshortened view.
- Mistake: not including a size reference, which causes misestimates of species.
- Mistake: assuming two visually similar fish are the same without habitat or behavior checks.
Where Fish Identifier fits after you check photo clues
Treat your photo-based checklist as the first filter: if you have a clear side profile, head close-up, and a size reference, you’ve done the heavy lifting. Use that evidence to produce a short list of probable families or genera before you consult any app or guide. This makes automated suggestions easier to evaluate because you already know which clues are decisive.
Fish Identifier is best used after you gather those photos and contextual notes: treat the app as a rapid second opinion that suggests likely matches based on visible clues. Keep your checklist visible: compare the app’s suggestions back to the anatomical features and habitat evidence you recorded rather than accepting the top result blindly.
For deeper reading on common visual clues and lookalikes, consult the site’s Fish Visual Checklist: Common Clues, Lookalikes, and Next Steps. That reference expands on many of the clues covered here and gives additional photo examples to practice with before you rely on any single automated match.
- Step 1: Gather checklist photos (profile, head, fins, size reference).
- Step 2: Note habitat and behavior; rule out broad groups (fresh vs. salt).
- Step 3: Use Fish Identifier as a second opinion and cross-check its matches.
- Step 4: Confirm uncertain matches with extra photos or expert sources.
Next steps by confidence level after identifying fish by photo
High confidence: If a photo shows multiple diagnostic traits (unique fin arrangement, unmistakable markings, and matching habitat) you can often treat the ID as reliable for casual purposes. Record measurement, location, and time, and note the degree of confidence. If you need the ID for regulation, sale, or conservation reporting, still verify with a trusted authority or a ichthyologist because regulations may require expert confirmation.
Partial confidence: When several clues match but a few remain ambiguous, collect additional photos and contextual notes. Aim for a clear side profile and a head shot showing mouth and eye position; this often separates closely related species. You can also compare your photos with multiple field guides or targeted online resources to see which diagnostic traits are consistently cited.
Low confidence or uncertain match: Treat the photo as a research note. Don’t make safety, legal, or edibility decisions from an uncertain ID. Ask for help: post your annotated photos to a forum frequented by local experts, contact a local fisheries extension office, or consult a fish biologist. Keep the original photos and include details about location, depth, and behavior when requesting verification.
- High confidence: record details, but verify for legal or conservation use.
- Partial confidence: take additional photos and compare guides for diagnostic traits.
- Uncertain: seek expert help and avoid decisions based solely on the photo.
- Always preserve original images and contextual notes for follow-up.
Limitations: when a photo won’t give a definitive fish identification
Some species are effectively indistinguishable in field photos because the differences are microscopic (scale counts, subtle meristic counts, or internal anatomy) or seasonal. In these cases, even careful photographs won’t replace a specimen-based examination or an expert verification that includes measurements and counts.
Photos are also limited when they omit key diagnostic views. For example, many species require a view of the gill cover, the fin base, or the underside to separate close relatives; hobbyist photos rarely capture these without deliberate effort. Be honest about what your images show and avoid overstating certainty when important features are missing.
Finally, do not use a photo alone to make safety or legal decisions. Whether a fish is edible, protected, or has commercial value often depends on regulatory definitions, age/size class, and local rules that a photo cannot confirm. When stakes are high—public health, legal compliance, or species protection—seek professional confirmation.
- Some species require scale or fin-ray counts not visible in photos.
- Key diagnostic views (gill cover, underside, fin base) are often missing.
- Photos alone cannot determine edibility, toxicity, or legal status.
- When decisions carry risk, get an expert or specimen-based confirmation.
Related guides
Try Fish Identifier after you check visible clues
Use Fish Identifier as a practical second opinion once you’ve gathered good photos and contextual notes. Treat app suggestions as research leads: compare them against your visible clues, add more images if matches are unclear, and keep uncertain results as notes for expert follow-up. Download the Fish Identifier app on iOS to scan photos, compare suggested matches, and use the results as one step in a careful verification process.

Frequently asked questions
Can I identify a fish from a single photo?
Sometimes. A single, well-composed photo that shows a clear side profile, head details, and size reference can identify many common species to genus or species level. However, because some species differ only in small counts or internal features, a single image is often insufficient for a forensic-grade identification. Treat one photo as powerful evidence but confirm important IDs with extra photos or expert input.
What photos give the best chance to identify fish by picture?
Best results come from a combination: a straight side-on profile for shape and fin placement, a close-up of the head and mouth, fin close-ups (dorsal and tail), and a size reference like a ruler or coin. Also include a habitat shot (shoreline, substrate) and note the capture context. Multiple angles reduce misreads from perspective or glare and make odd markings visible.
How accurate are app-based fish photo identifications?
App-based matches can be a helpful starting point but vary in accuracy by species, image quality, and available reference data. Apps often excel at suggesting likely families or common species from clear images. Always cross-check app suggestions against the anatomical clues you recorded and, when outcomes matter, follow up with human experts or local authorities for confirmation.
What should I do if I need a definitive ID for safety, sale, or regulation?
Don't rely on a casual photo alone. For legal or safety-sensitive purposes, preserve the specimen if regulations allow, take multiple diagnostic photos, record exact location and measurements, and contact a local fisheries agency, extension office, or qualified ichthyologist for verification. Many agencies require expert confirmation or specimen submission for formal determination.